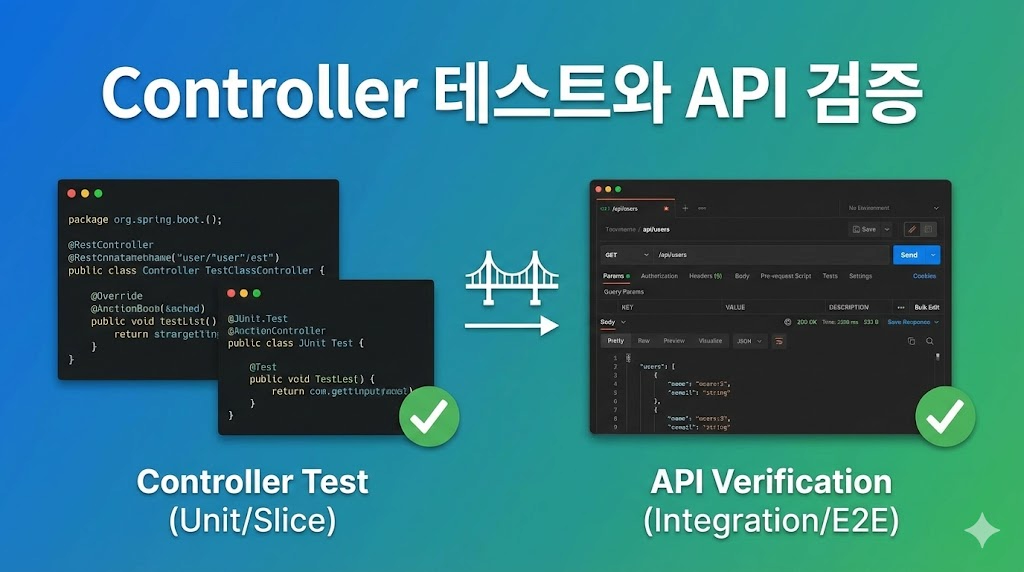
 Controller 테스트와 API 검증 - Spring Boot로 시작하는 TDD 8편Controller Testing and API Verification - TDD with Spring Boot Part 8
📅
들어가기 전에 🔗
지난 시간까지 우리는 데이터를 저장하는
Repository
와 핵심 로직을 담당하는 Service
를 모두 만들고 검증했습니다.
식당으로 비유하자면, 신선한 재료(Repository)와 요리를 만드는 셰프(Service)가 준비된 상태입니다.이제 마지막으로 손님의 주문을 받고 요리를 서빙할
웨이터(Controller)
가 필요합니다.
이번 시간에는 외부(웹 브라우저, 앱)에서 우리 프로그램을 사용할 수 있도록 API를 만들고, 이 API가 제대로 동작하는지 테스트하는 방법을 알아보겠습니다.API 테스트 기본 구조 🔗
Controller를 테스트할 때는
@SpringBootTest가 아닌 @WebMvcTest를 주로 사용합니다.
이 둘의 차이를 아는 것이 중요합니다.- @SpringBootTest스프링의 모든 설정을 다 로드합니다. DB, Service, Controller 등 모든 빈을 다 띄우기 때문에무겁고 느립니다.통합 테스트에 적합합니다.
- @WebMvcTest웹 계층(Controller)과 관련된 빈만 로드합니다. Service나 Repository는 로드하지 않기 때문에가볍고 빠릅니다.단위 테스트에 적합합니다.
우리는 TDD의 원칙에 따라 빠르고 격리된 테스트를 지향하므로
@WebMvcTest를 사용하겠습니다.실패하는 테스트 작성 (Red) 🔗
가장 먼저 Controller에 대한 테스트 코드를 작성합니다.
아직 Controller 클래스조차 없지만, 우리가 원하는 API의 모습을 상상하며 코드를 짭니다.
1. 테스트 클래스 생성 🔗
MockMvc라는 도구를 사용하여 마치 실제 사용자가 요청을 보낸 것처럼 흉내를 낼 것입니다.package com.example.tdd_study.product;
import org.junit.jupiter.api.Test;
import org.springframework.beans.factory.annotation.Autowired;
import org.springframework.boot.test.autoconfigure.web.servlet.WebMvcTest;
import org.springframework.boot.test.mock.mockito.MockBean;
import org.springframework.http.MediaType;
import org.springframework.test.web.servlet.MockMvc;
import org.springframework.test.web.servlet.request.MockMvcRequestBuilders;
import org.springframework.test.web.servlet.result.MockMvcResultMatchers;
@WebMvcTest(ProductController.class) // 테스트할 컨트롤러만 명시
class ProductControllerTest {
@Autowired
private MockMvc mockMvc; // 브라우저 역할을 하는 가짜 객체
@MockBean // 가짜 Service 빈 등록
private ProductService productService;
@Test
void 상품_등록_API() throws Exception {
// given: 요청 데이터 준비 (JSON 형태)
String requestBody = "{\"name\": \"아메리카노\", \"price\": 4000}";
// when & then: POST 요청을 보내고 검증
mockMvc.perform(MockMvcRequestBuilders.post("/products")
.contentType(MediaType.APPLICATION_JSON)
.content(requestBody))
.andExpect(MockMvcResultMatchers.status().isOk());
}
}이 코드를 실행하면 당연히 실패합니다.
ProductController가 없다는 에러가 발생할 것입니다.
이제 이 빨간 불을 끄러 가봅시다.DTO 도입과 기능 구현 (Green) 🔗
API를 만들 때 중요한 규칙이 하나 있습니다.
바로 *Entity(Product)*를 직접 요청이나 응답에 사용하지 않는 것입니다.
Entity는 DB와 강하게 연결되어 있어, 화면에 보여주는 데이터와는 성격이 다르기 때문입니다.
그래서 **데이터 전달만을 위한 객체(DTO)**를 따로 만드는 것이 좋습니다.
1. DTO 클래스 생성 🔗
요청 데이터를 받을 DTO를 만듭니다.
package com.example.tdd_study.product.dto;

import lombok.Getter;
import lombok.NoArgsConstructor;

@Getter
@NoArgsConstructor
public class AddProductRequest {
    private String name;
    private int price;

    public AddProductRequest(String name, int price) {
        this.name = name;
        this.price = price;
    }
}
2. Controller 구현 🔗
이제 Controller를 만들고 Service를 연결합니다.
여기서
@RestController와 @PostMapping, @RequestBody가 사용됩니다.package com.example.tdd_study.product;
import com.example.tdd_study.product.dto.AddProductRequest;
import org.springframework.web.bind.annotation.PostMapping;
import org.springframework.web.bind.annotation.RequestBody;
import org.springframework.web.bind.annotation.RestController;
@RestController
public class ProductController {
private final ProductService productService;
public ProductController(ProductService productService) {
this.productService = productService;
}
@PostMapping("/products")
public void register(@RequestBody AddProductRequest request) {
productService.register(request.getName(), request.getPrice());
}
}Request/Response 검증 방법 🔗
이제 다시 테스트를 돌려보면 초록 불(Green)이 뜰 것입니다.
하지만 조금 아쉽습니다.
우리는 단순히 "에러가 안 난다" 정도만 확인했기 때문입니다.
조금 더 꼼꼼하게 검증해 보겠습니다.
Gson 라이브러리를 사용하면 자바 객체를 JSON 문자열로 편하게 바꿀 수 있어 하드코딩을 피할 수 있습니다.
(build.gradle에 com.google.code.gson:gson 의존성을 추가하면 좋습니다. 없다면 Jackson을 써도 됩니다.)dependencies {
// ... 기존 의존성 생략
implementation 'com.google.code.gson:gson:2.8.9' // Gson 라이브러리 추가
}개선된 테스트 코드 🔗
package com.example.tdd_study.product;

import com.example.tdd_study.product.dto.AddProductRequest;
import org.junit.jupiter.api.Test;
import org.springframework.beans.factory.annotation.Autowired;
import org.springframework.boot.test.autoconfigure.web.servlet.WebMvcTest;
import org.springframework.boot.test.mock.mockito.MockBean;
import org.springframework.http.MediaType;
import org.springframework.test.web.servlet.MockMvc;
import org.springframework.test.web.servlet.request.MockMvcRequestBuilders;
import org.springframework.test.web.servlet.result.MockMvcResultMatchers;
import com.google.gson.Gson;

@WebMvcTest(ProductController.class)
class ProductControllerTest {

    @Autowired
    private MockMvc mockMvc;

    @MockBean
    private ProductService productService;

    @Test
    void 상품_등록_API_검증() throws Exception {
        // given
        AddProductRequest request = new AddProductRequest("라떼", 5000);
        Gson gson = new Gson();
        String jsonContent = gson.toJson(request); // 객체 -> JSON 자동 변환

        // when & then
        mockMvc.perform(MockMvcRequestBuilders.post("/products")
                        .contentType(MediaType.APPLICATION_JSON)
                        .content(jsonContent))
                .andExpect(MockMvcResultMatchers.status().isOk()); // 200 OK 확인

        // verify를 통해 실제로 Service가 호출되었는지 확인 가능
        // verify(productService).register("라떼", 5000);
    }
}
@RequestBody의 역할 🔗
여기서
@RequestBody가 아주 중요한 역할을 합니다.
이 어노테이션은 택배 기사님과 같습니다.
사용자가 보낸 JSON 상자(데이터)를 뜯어서 자바 객체(AddProductRequest)에 알맞게 넣어줍니다.
만약 이 어노테이션을 빼먹으면 요청 데이터가 다 null로 들어오니 주의해야 합니다.실행 결과 🔗
이제 테스트를 실행하면, 우리가 원하는 API가 제대로 동작하는지 검증할 수 있습니다.
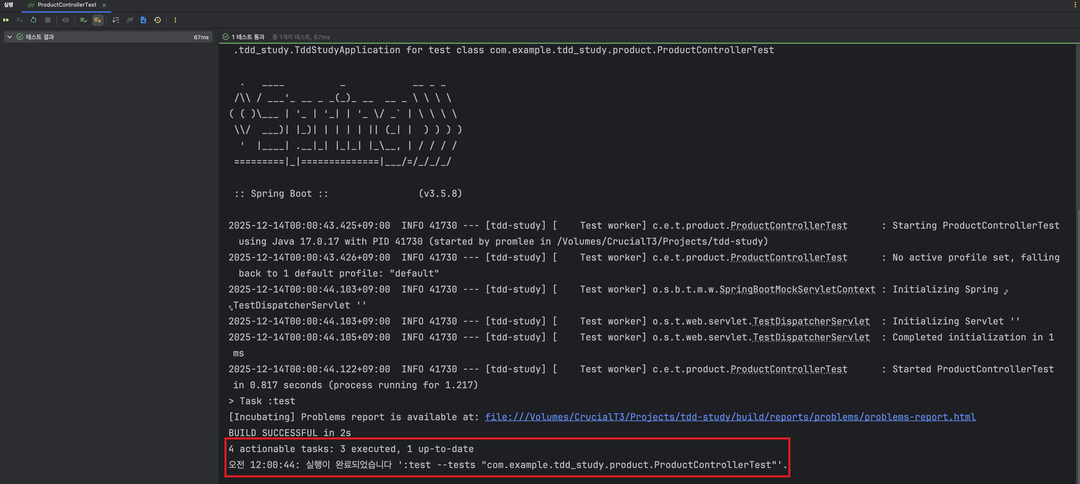
테스트 성공
결론 🔗
오늘 Controller 테스트까지 마치면서 우리는
Repository -> Service -> Controller
로 이어지는 전체 계층을 모두 TDD로 구현했습니다.- @WebMvcTest웹 계층만 뚝 떼어내어 가볍게 테스트했습니다.
- MockMvc가짜 브라우저를 이용해 API 요청을 보내고 상태 코드(200 OK)를 검증했습니다.
- DTO 사용Controller와 Service 사이의 데이터를 주고받을 때 Entity 대신 DTO를 사용하여 설계를 분리했습니다.
이제 기본적인 기능 구현은 끝났습니다.
하지만 아직 부족한 점이 있습니다.
Service와 Controller가 서로 의존하고 있는데, 이를 더 깔끔하게 분리하는 방법과 Mock 객체를 더 능숙하게 다루는 방법이 필요합니다.
다음 시간에는Mockito를 활용한 의존성 분리 심화편을 다루겠습니다.
참고 🔗
- Spring MVC Test Framework↗ MockMvc를 포함한 스프링 웹 테스트 프레임워크에 대한 공식 문서입니다.
- JSON Path Guide↗ API 응답 검증 시 복잡한 JSON 데이터를 쉽게 찾을 수 있게 해주는 문법 가이드입니다.