 컴포넌트 리팩토링과 테스트 유지 - React로 시작하는 TDD 5편Component Refactoring and Maintaining Tests - TDD with React Part 5
📅
들어가기 전에 🔗
지난 시간 우리는
Counter
컴포넌트를 만들고 테스트를 통과시켰습니다.
이번 시간에는 이 컴포넌트를 리팩토링하여 구조를 개선하는 방법을 알아보겠습니다.트러블 슈팅 및 팁 🔗
1. describe, it 빨간 줄 해결 🔗
Vitest
를 사용하더라도 에디터(VS Code, WebStorm 등)가 Jest
의 문법을 기준으로 코드를 검사할 때가 있습니다.
이때 describe나 it 같은 함수를 못 찾아서 빨간 줄이 뜰 수 있습니다.
이럴 때는 Jest
의 타입 정의 패키지를 개발용으로 설치해 주면 깔끔하게 해결됩니다.npm i --save-dev @types/jest설치 후에는 빨간 줄이 사라질 것입니다.
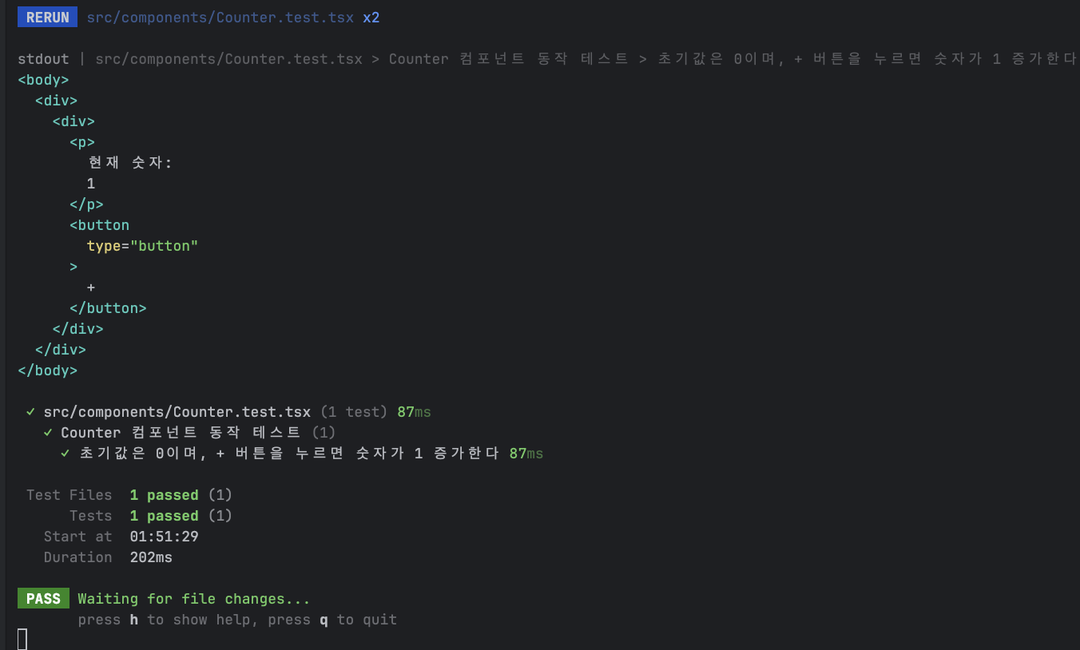
2. 상세 로그 확인하기 (screen.debug) 🔗
터미널에
PASS
만 뜨고 끝나는 게 아쉽다면, RTL
이 제공하는 디버깅 도구를 사용해 보세요.
테스트 코드 중간에 screen.debug()를 넣으면, 그 시점의 HTML 구조를 콘솔에 출력해 줍니다.// ... import 생략
describe('Counter 컴포넌트 동작 테스트', () => {
test('...', async () => {
const user = userEvent.setup();
render(<Counter />);
// [팁] 클릭하기 전 화면 상태 출력
console.log('--- 클릭 전 ---');
screen.debug();
const incrementBtn = screen.getByRole('button', { name: '+' });
await user.click(incrementBtn);
// [팁] 클릭한 후 화면 상태 출력
console.log('--- 클릭 후 ---');
screen.debug();
expect(screen.getByText('현재 숫자: 1')).toBeInTheDocument();
});
});이렇게 하면 터미널에 현재 렌더링 된 HTML(DOM)이 텍스트 형태로 쭉 출력됩니다.
테스트가 왜 실패하는지 모를 때 가장 확실한 해결책입니다.
리팩토링: 컴포넌트 분리 🔗
자, 이제 문제를 해결했으니 본론으로 돌아옵시다.
현재 우리의
Counter
컴포넌트는 잘 동작하지만, 구조적으로 아쉬운 점이 있습니다.
button 태그가 Counter
안에 꽉 박혀 있어서(하드코딩), 다른 곳에서 이 버튼을 재사용할 수가 없습니다.그래서 버튼을 별도의 컴포넌트(
CountButton)로 분리해 보겠습니다.
이때 중요한 것은 코드를 뜯어고쳐도 기존 기능(테스트)은 그대로 통과해야 한다
는 점입니다.1. CountButton 컴포넌트 생성 🔗
먼저 버튼 역할을 할 자식 컴포넌트를 만듭니다.
부모로부터
onClick 함수와 label(버튼 이름)을 받아오도록 설계합니다.// Props 타입을 정의하여 TypeScript의 장점을 살립니다.
interface Props {
label: string;
onClick: () => void;
}
export default function CountButton({ label, onClick }: Props) {
return (
<button type="button" onClick={onClick}>
{label}
</button>
);
}2. Counter 컴포넌트 수정 🔗
이제
Counter
컴포넌트에서 기존 button 태그를 지우고, 방금 만든 CountButton
으로 교체합니다.import { useState } from 'react';
import CountButton from './CountButton'; // [추가]
export default function Counter() {
const [count, setCount] = useState(0);
const handleClick = () => {
setCount(prev => prev + 1);
};
return (
<div>
<p>현재 숫자: {count}</p>
{/* [변경] 기존 button 태그 대신 컴포넌트 사용 */}
<CountButton label="+" onClick={handleClick} />
</div>
);
}테스트의 가치: 안정성 확인 🔗
우리는 방금 코드를 꽤 많이 수정했습니다.
파일을 나누고, import를 하고, props를 넘겨주었습니다.
혹시 실수로 뭔가 빠뜨렸으면 어떡하죠?
이때 TDD의 진가가 발휘됩니다.
우리는 테스트 코드를
단 한 줄도 수정하지 않았습니다.
그대로 터미널에서 테스트를 실행해 봅시다.npm test결과 확인 🔗
결과 확인
PASS src/components/Counter.test.tsx여전히 초록색
PASS
가 뜬다면 리팩토링은 100% 성공입니다!- 기존 테스트:
getByRole('button', { name: '+' }) - 변경 전:
<button>+</button>(찾을 수 있음) - 변경 후:
<CountButton label="+" ... />-> 결국 HTML로는<button>+</button>(찾을 수 있음)
사용자(테스트 코드) 입장에서는 내부가 어떻게 쪼개졌든 상관없이, 화면에
+ 버튼이 있고 누르면 숫자가 올라가는지
만 중요하기 때문입니다.
이것이 바로 구현 상세를 테스트하지 말라
는 원칙의 장점입니다.결론 🔗
소스 코드는 GitHub - Promleeblog/react-tdd-setup↗ 에서 확인할 수 있습니다.
git clone https://github.com/PROMLEE/my-tdd-app.git
cd my-tdd-app
git checkout part5
오늘은 테스트 환경에서의 팁과 리팩토링 과정을 다루었습니다.
- 트러블 슈팅
@types/jest로 빨간 줄을 없애고,screen.debug()로 HTML 구조를 눈으로 확인했습니다. - 리팩토링버튼을 별도 컴포넌트로 분리하여 재사용성을 높였습니다.
- 테스트의 보호내부 구조를 변경했음에도 테스트 코드를 수정할 필요가 없었으며, 기능이 망가지지 않았음을 즉시 확인할 수 있었습니다.
이제 단순한 숫자 증가뿐만 아니라, 특정 조건에 따라 화면이 바뀌는 복잡한 로직이 필요하다면 어떨까요?
다음 시간에는6편. 상태(State) 변화 테스트를 통해 조건부 렌더링을 테스트하는 방법을 알아보겠습니다.
참고 🔗
- Debugging - Testing Library↗ screen.debug()를 포함한 다양한 디버깅 방법에 대한 공식 문서입니다.
- TypeScript with React↗ React 컴포넌트에서 Props 타입을 정의하는 방법에 대한 공식 가이드입니다.