 AWS LambdaとS3でアップロード画像を自動リサイズ・WebP変換する
📅
Your site is growing! Your free team promes-projects has used 75% of the included free tier usage for Image Optimization - Cache Writes (100,000 Writes). サイトが成長しています。 無料チームpromes-projectsは、画像最適化のキャッシュ書き込みについて、無料枠100,000回の75%を使用しました。
original-image-bucket-promethumbnail-image-bucket-prome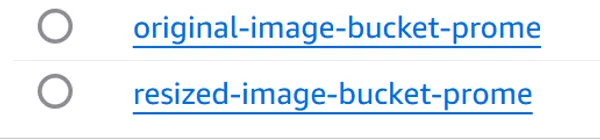
{
    "Version": "2012-10-17",
    "Statement": [
        {
            "Effect": "Allow",
            "Action": [
                "logs:PutLogEvents",
                "logs:CreateLogGroup",
                "logs:CreateLogStream"
            ],
            "Resource": "arn:aws:logs:*:*:*"
        },
        {
            "Effect": "Allow",
            "Action": [
                "s3:GetObject"
            ],
            "Resource": "arn:aws:s3:::*/*"
        },
        {
            "Effect": "Allow",
            "Action": [
                "s3:PutObject"
            ],
            "Resource": "arn:aws:s3:::*/*"
        }
    ]
}
LambdaS3Policyとして作成します。
このポリシーで、Lambda関数からS3へのアクセスを許可します。
LambdaS3Policyを選び、名前をLambdaS3Roleとして作成します。LambdaS3Roleを選びます。


mkdir resize-image
cd resize-image
npm initsharpをインストールします。
sharpは画像のリサイズに使うライブラリです。npm install --platform=linux --arch=x64 sharp@0.32.6index.mjsを作ります。
最終的なフォルダー構造は次のとおりです。📦resize-image
┣ 📂node_modules
┣ 📜index.mjs
┣ 📜package-lock.json
┗ 📜package.json
// dependencies
import { S3Client, GetObjectCommand, PutObjectCommand } from '@aws-sdk/client-s3';

import { Readable } from 'stream';

import sharp from 'sharp';
import util from 'util';


// create S3 client
const s3 = new S3Client({region: 'us-east-1'});

// define the handler function
export const handler = async (event, context) => {

// Read options from the event parameter and get the source bucket
console.log("Reading options from event:\n", util.inspect(event, {depth: 5}));
  const srcBucket = event.Records[0].s3.bucket.name;

// Object key may have spaces or unicode non-ASCII characters
const srcKey    = decodeURIComponent(event.Records[0].s3.object.key.replace(/\+/g, " "));
const dstBucket = srcBucket + "-resized";
const dstKey    = "resized-" + srcKey;

// Infer the image type from the file suffix
const typeMatch = srcKey.match(/\.([^.]*)$/);
if (!typeMatch) {
  console.log("Could not determine the image type.");
  return;
}

// Check that the image type is supported
const imageType = typeMatch[1].toLowerCase();
if (imageType != "jpg" && imageType != "png") {
  console.log(`Unsupported image type: ${imageType}`);
  return;
}

// Get the image from the source bucket. GetObjectCommand returns a stream.
try {
  const params = {
    Bucket: srcBucket,
    Key: srcKey
  };
  var response = await s3.send(new GetObjectCommand(params));
  var stream = response.Body;

// Convert stream to buffer to pass to sharp resize function.
  if (stream instanceof Readable) {
    var content_buffer = Buffer.concat(await stream.toArray());

  } else {
    throw new Error('Unknown object stream type');
  }


} catch (error) {
  console.log(error);
  return;
}


// set thumbnail width. Resize will set the height automatically to maintain aspect ratio.
const width  = 200;

// Use the sharp module to resize the image and save in a buffer.
try {
  var output_buffer = await sharp(content_buffer).resize(width).toBuffer();

} catch (error) {
  console.log(error);
  return;
}

// Upload the thumbnail image to the destination bucket
try {
  const destparams = {
    Bucket: dstBucket,
    Key: dstKey,
    Body: output_buffer,
    ContentType: "image"
  };

  const putResult = await s3.send(new PutObjectCommand(destparams));

  } catch (error) {
    console.log(error);
    return;
  }

  console.log('Successfully resized ' + srcBucket + '/' + srcKey +
    ' and uploaded to ' + dstBucket + '/' + dstKey);
};original-image-bucket-promeへアップロードした画像をリサイズし、resized-image-bucket-promeへ保存します。
元の画像形式に応じて、変換後の拡張子を変更します。
たとえばimage.jpgは、リサイズ後にimage.webpとして保存します。
元からWebPの場合は、リサイズのみ行います。
GIFのようなアニメーション画像にも対応しています。// dependencies
import {
S3Client,
GetObjectCommand,
PutObjectCommand,
} from "@aws-sdk/client-s3";
import { Readable } from "stream";
import sharp from "sharp";
// create S3 client
const s3 = new S3Client({ region: "ap-northeast-2" });
// define the handler function
export const handler = async (event, context) => {
const srcBucket = event.Records[0].s3.bucket.name;
const srcKey = decodeURIComponent(
event.Records[0].s3.object.key.replace(/\+/g, " ")
);
const dstBucket = "resized-image-bucket-prome"; // 리사이즈된 이미지를 저장할 버킷 이름
const filename = srcKey.split("/").pop(); // 파일명만 추출
const dstKey = `${filename.replace(/\.[^.]+$/, ".webp")}`;
const typeMatch = srcKey.match(/\.([^.]*)$/);
if (!typeMatch) {
return;
}
const imageType = typeMatch[1].toLowerCase();
// WebP 파일은 변환 없이 그대로 복사
if (imageType === "webp") {
try {
const params = {
Bucket: srcBucket,
Key: srcKey,
};
var response = await s3.send(new GetObjectCommand(params));
var stream = response.Body;
if (stream instanceof Readable) {
var content_buffer = Buffer.concat(await stream.toArray());
} else {
throw new Error("알 수 없는 객체 스트림 타입입니다");
}
const destparams = {
Bucket: dstBucket,
Key: dstKey,
Body: content_buffer,
ContentType: "image/webp",
};
await s3.send(new PutObjectCommand(destparams));
return;
} catch (error) {
return;
}
}
try {
const params = {
Bucket: srcBucket,
Key: srcKey,
};
var response = await s3.send(new GetObjectCommand(params));
var stream = response.Body;
if (stream instanceof Readable) {
var content_buffer = Buffer.concat(await stream.toArray());
} else {
throw new Error("알 수 없는 객체 스트림 타입입니다");
}
} catch (error) {
return;
}
const width = 600;
const height = 600;
try {
let sharpInstance = sharp(content_buffer, {
animated: true, // 애니메이션 GIF 지원
pages: -1, // 모든 프레임 처리
}).resize(width, height, {
fit: sharp.fit.inside,
});
var output_buffer = await sharpInstance
.webp({
lossless: false,
animated: true, // 애니메이션 보존
})
.toBuffer();
} catch (error) {
return;
}
try {
const destparams = {
Bucket: dstBucket,
Key: dstKey,
Body: output_buffer,
ContentType: "image/webp",
};
await s3.send(new PutObjectCommand(destparams));
} catch (error) {
return;
}
};
index.mjsとnode_modulesを含めて圧縮します。
特にnode_modulesは必ず含めてください。
AWS LambdaではNode.jsランタイムを使うため、必要な依存関係をすべて同梱する必要があります。
作成したZIPをLambdaコンソールへ戻ってアップロードします。
コードタブのアップロードからZIPを選択します。
アップロードが完了すると、Lambda関数が作成されます。original-image-bucket-promeへ画像をアップロードします。original-image-bucket-promeへ画像をアップロードし、テストタブでイベントを作ります。
次のようにS3 PUTテンプレートを作成します。
{
  "Records": [
    {
      "eventVersion": "2.0",
      "eventSource": "aws:s3",
      "awsRegion": "ap-northeast-2", // 리전
      "eventTime": "1970-01-01T00:00:00.000Z",
      "eventName": "ObjectCreated:Put",
      "userIdentity": {
        "principalId": "EXAMPLE"
      },
      "requestParameters": {
        "sourceIPAddress": "127.0.0.1"
      },
      "responseElements": {
        "x-amz-request-id": "EXAMPLE123456789",
        "x-amz-id-2": "EXAMPLE123/5678abcdefghijklambdaisawesome/mnopqrstuvwxyzABCDEFGH"
      },
      "s3": {
        "s3SchemaVersion": "1.0",
        "configurationId": "testConfigRule",
        "bucket": {
          "name": "original-image-bucket-prome", // 사진이 저장된된 버킷 이름
          "ownerIdentity": {
            "principalId": "EXAMPLE"
          },
          "arn": "arn:aws:s3:::original-image-bucket-prome" // 사진이 저장된된 버킷 ARN
        },
        "object": {
          "key": "1234.png", // 파일 이름
          "size": 1024,
          "eTag": "0123456789abcdef0123456789abcdef",
          "sequencer": "0A1B2C3D4E5F678901"
        }
      }
    }
  ]
}resized-image-bucket-promeに画像が保存されていることを確認します。
失敗したら、CloudWatch Logsでエラーメッセージを確認します。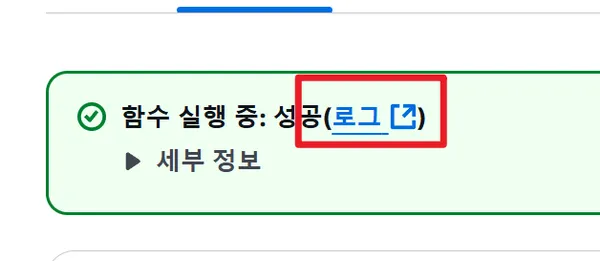


module.exports = {
	images: {
		unoptimized: true,
	},
};